 Save to Pinterest
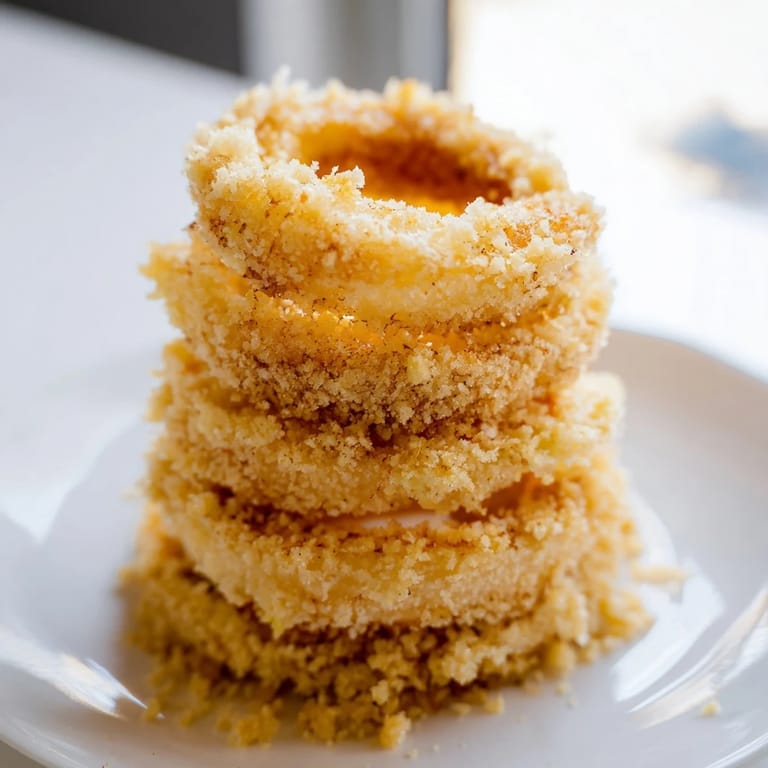
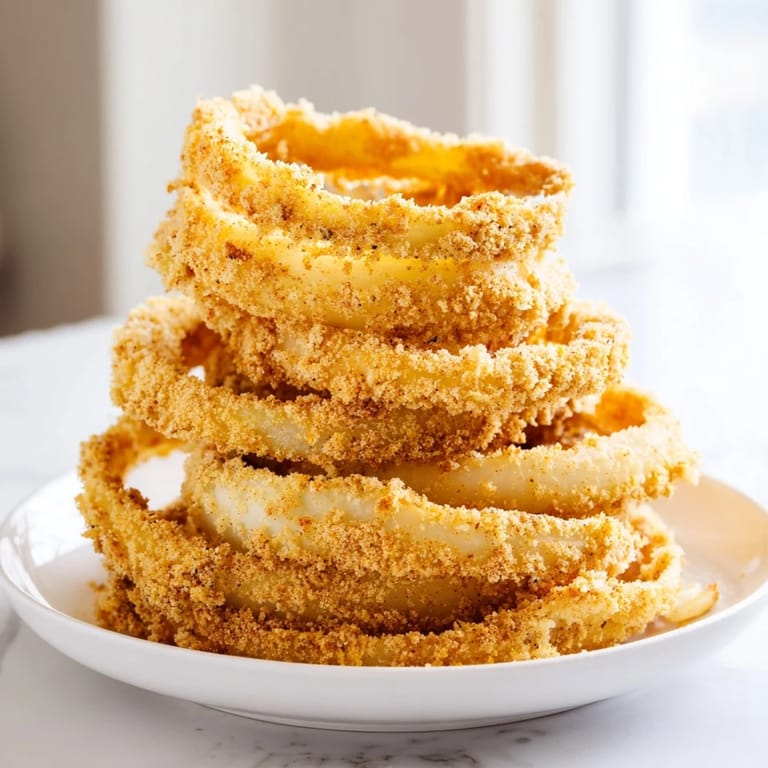
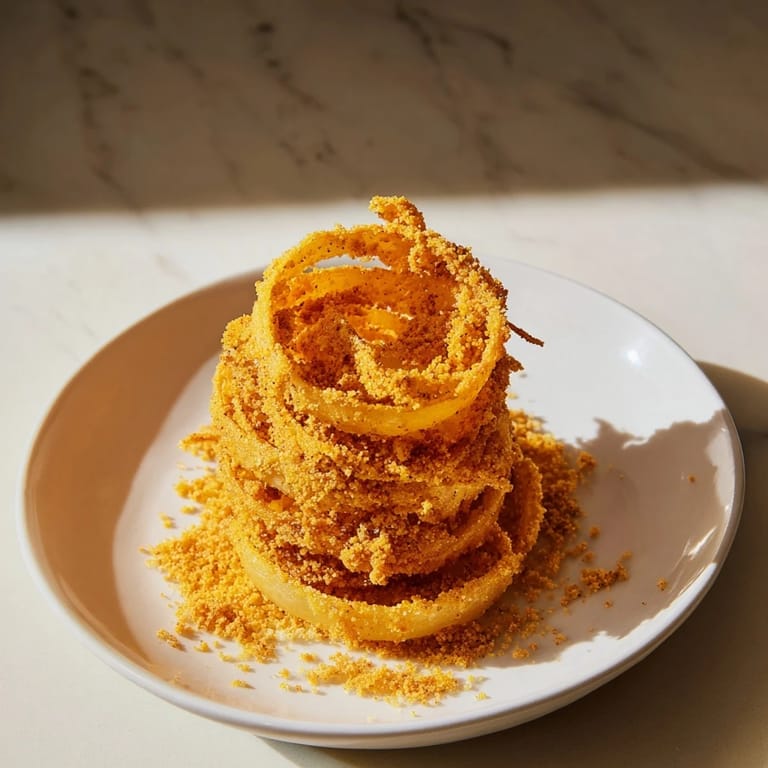
 My friend Sarah brought these to a potluck last summer, stacked them into this precarious tower right on the serving platter, and I watched them disappear faster than anything else there. I'd never thought much about onion rings until that moment—suddenly I understood they weren't just a side dish, they were an event. The crispy exterior gave way to a tender, almost sweet onion inside, and the panko coating had this satisfying crunch that made people keep reaching back for more. Now I make them whenever I want to turn an ordinary meal into something people remember.
I made these for my sister's birthday dinner and she asked me to do it again before dessert even hit the table. The whole kitchen smelled like caramelized onions and toasted bread, and honestly, that smell alone had everyone hovering near the counter before they were even done frying. There's something about a homemade appetizer that feels like you've really pulled out the stops, even though these are surprisingly straightforward to make.
Ingredients
- Large yellow onions: Two thick-cut rings from one onion can feel like a tiny meal on their own—aim for ¾-inch thickness so the inside steams gently while the outside crisps up.
- All-purpose flour and cornstarch: The combination of both creates layers of texture; skip the cornstarch and you'll get something denser that doesn't have quite the same shattering crunch.
- Baking powder: This is the silent hero that aerates your batter and makes it light rather than heavy and doughy.
- Smoked paprika, garlic powder, and freshly ground black pepper: Don't skip the smoked paprika—it adds a subtle depth that makes people ask what the secret ingredient is.
- Cold sparkling water: The bubbles create tiny pockets of air in the batter, and the cold temperature keeps everything light; still water will give you a tighter, tougher coating.
- Eggs: These bind everything together and help the batter cling to the onion.
- Panko breadcrumbs: Panko has bigger flakes than regular breadcrumbs, which means maximum crunch and visual appeal—regular breadcrumbs will give you a finer, smoother crust.
- Vegetable oil: Keep it neutral so the onions and spices shine; avoid olive oil which will smoke and compete with the flavors.
Tired of Takeout? 🥡
Get 10 meals you can make faster than delivery arrives. Seriously.
One email. No spam. Unsubscribe anytime.
Instructions
- Slice your onions with purpose:
- Peel two large yellow onions and slice them into ¾-inch rings—thick enough to hold their shape but thin enough to cook through. Separate the rings gently so you're working with individual loops, not nested pieces.
- Build your dry blend:
- Whisk together flour, cornstarch, baking powder, smoked paprika, garlic powder, salt, and black pepper in a large bowl. This step matters more than it seems—when everything is evenly distributed, every ring tastes balanced.
- Create the wet base:
- Beat cold sparkling water and eggs together until they're well combined and slightly foamy. Cold is the key word here—warm eggs and room-temperature water will make your batter heavier.
- Combine wet and dry:
- Pour the wet ingredients into the dry and whisk gently until you have a smooth batter, thick enough to cling to the onion but thin enough to drip slightly when you lift a ring. If it looks too thick, splash in a bit more cold water.
- Set up your coating station:
- Pour panko into a shallow dish and arrange it near your batter bowl. This is your assembly line.
- Dip and coat with confidence:
- Dip each onion ring into the batter, let the excess drip off for a second, then press it gently into the panko and turn it to coat both sides. The batter should peek through slightly—you're not aiming for a thick crust, just an even coat.
- Deep-fry path:
- Heat vegetable oil to 350°F in a pot or deep fryer, then fry rings in small batches for 2–3 minutes, turning occasionally, until they're deep golden brown. Overcrowding the pan drops the oil temperature and you'll get greasy rings instead of crispy ones.
- Air-fryer path:
- Preheat your air fryer to 400°F, arrange coated rings in a single layer, spray lightly with oil, and air-fry for 8–10 minutes, shaking the basket halfway through, until golden and crispy.
- Drain and rest:
- Lift finished rings onto a wire rack or paper towels to drain excess oil while they're still warm and steam is rising from them.
- Build your tower:
- Stack the rings into a tower on your serving platter and bring them out while they're still warm—this is the moment people gasp a little.
 Save to Pinterest
 Last winter, I made a huge batch for my roommates on a random Tuesday night, and we ate them standing around the kitchen island without plates, just paper towels and laughter. Nobody was dressed up, the lighting was harsh, but somehow that tower of golden rings made the whole evening feel special—like we were celebrating something that didn't need an occasion.
The Secret to Golden Perfection
The difference between onion rings that taste like they're coated in a crispy shell and ones that feel heavy comes down to three things working together: the baking powder aerating your batter, the sparkling water creating tiny bubbles, and keeping everything cold right up until it hits hot oil. I learned this the hard way after making dense, oily batches where I'd used room-temperature water and skipped the sparkling water entirely. Now I keep my batter in a bowl set over ice until I'm ready to fry, and it makes a noticeable difference.
Why Stack Them?
Honestly, the stacking is partly practical and partly theater. Stacked rings keep each other warm longer than a scattered pile would, and they look intentional on the platter—like you've put thought and care into the presentation. But mostly it's because a tower is just more fun to eat from. People slow down slightly, think about which ring to grab next, and the whole thing becomes interactive instead of just another appetizer to grab and go.
Keeping Them Crispy and Hot
If you're frying in batches, place finished rings on a rack set over a baking sheet in a 200°F oven while you work through the rest. The rack is important because it lets air circulate underneath and prevents the bottoms from getting soggy. This way, by the time your last batch is done, your first batch is still crispy and warm, not rubbery and cold.
- Add grated Parmesan or a pinch of cayenne to your panko before coating for extra flavor with no extra work.
- Serve with spicy mayo, ranch, or even a tangy comeback sauce alongside classic ketchup.
- If you're making these for a crowd, prep all your rings and coat them an hour ahead, then fry just before serving.
 Save to Pinterest
 These rings are the kind of recipe that makes you feel like you've done something special without actually being difficult—which is exactly when cooking feels most rewarding. Make them once and you'll find yourself coming back to them for every gathering that needs a moment of joy.
Recipe Questions & Answers
- → How do I achieve the perfect crispiness on onion rings?
Ensure the batter is smooth but thick enough to coat the onions, then dredge in panko breadcrumbs before frying. Frying at 350°F (175°C) for 2–3 minutes yields a golden crispy exterior without sogginess.
- → Can I use an air fryer instead of deep frying?
Yes, air fry coated rings at 400°F (200°C) for 8–10 minutes, turning halfway, to get a crispy texture with less oil.
- → What spices enhance the batter flavor?
Smoked paprika, garlic powder, salt, and black pepper add smoky and savory notes that elevate the onion rings’ flavor.
- → How should onion rings be sliced for best results?
Slice onions into ¾-inch thick rings to ensure they hold up well during frying and maintain a nice crunch inside.
- → What dipping sauces complement these onion rings?
Spicy mayo, ranch, and classic ketchup each pair beautifully, adding contrasting flavors that complement the crispy, savory rings.
- → How can I keep onion rings crisp if preparing in batches?
Place finished rings on a wire rack in a warm oven at 200°F (95°C) to maintain crispness while frying remaining batches.