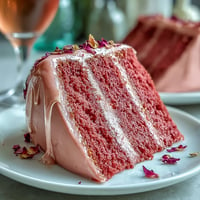
 Save to Pinterest
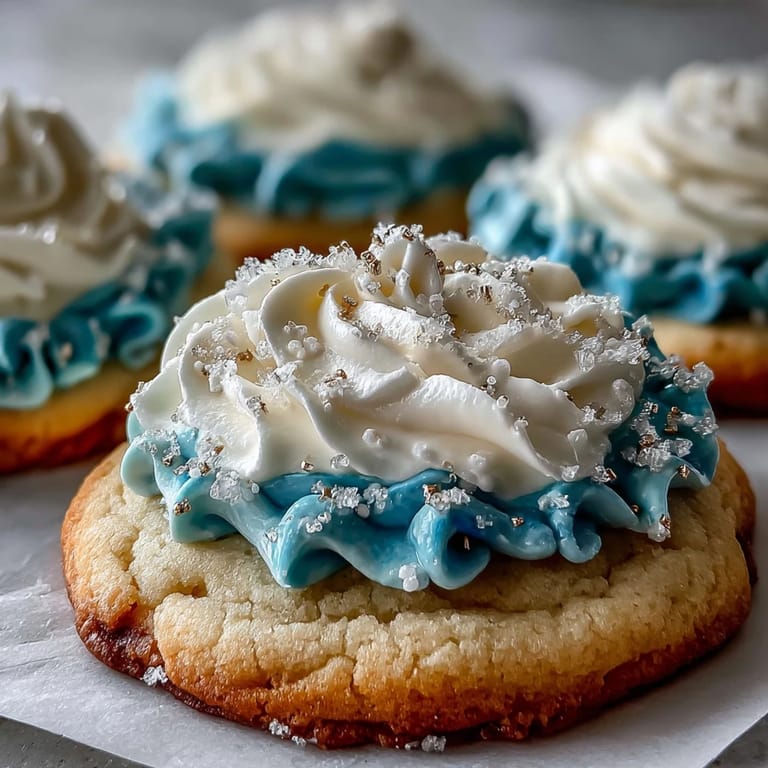
 My roommate came home one afternoon clutching a Cookie Run Kingdom screenshot, insisting we had to recreate Pure Vanilla Cookie as actual cookies. I'd never heard of the game, but something about the ethereal blue-and-white aesthetic made me want to try. By evening, we had vanilla dough chilling in the fridge and a plan to pipe royal icing like we were decorating tiny edible crowns. What started as a joke became our most requested treat.
I brought these to a themed birthday party last spring, arranged in a tiered stand with fresh flowers around the base. Someone took one look and said they were too pretty to eat—then grabbed three more when they thought nobody was watching. That's when I knew the combination of delicate vanilla flavor and glossy decorated icing had actually worked.
Ingredients
- All-purpose flour (2 1/2 cups): The foundation of tender cookies; make sure it's fresh because old flour can make dough taste slightly off.
- Unsalted butter (3/4 cup, softened): Room temperature is non-negotiable—cold butter won't cream properly and you'll lose that light, fluffy texture that makes these melt on your tongue.
- Granulated sugar (1 cup): This sweetness balances the vanilla without overpowering it, and the granules help create that slight crumbly edge we want.
- Pure vanilla extract (2 tsp): Don't cheap out here; real vanilla makes the whole recipe sing in a way imitation just can't replicate.
- Egg (1 large): Room temperature, if you remember—it helps the dough emulsify better and bake more evenly.
- Baking powder (1/2 tsp): Just enough lift to keep the cookies tender, not cake-like.
- Powdered sugar (2 cups, sifted): Sifting removes lumps; I learned this the hard way with grainy icing the first time.
- Meringue powder (2 tbsp): The secret to glossy, hard-setting icing that doesn't crack; it also stabilizes the mixture so it won't weep.
- Gel food coloring: Gel holds color better than liquid without thinning the icing, which would ruin the consistency you've worked to build.
Tired of Takeout? 🥡
Get 10 meals you can make faster than delivery arrives. Seriously.
One email. No spam. Unsubscribe anytime.
Instructions
- Mix your dry team:
- Whisk flour, baking powder, and salt together in a medium bowl and set it aside—this early combination ensures the leavening distributes evenly so no cookie bakes with pockets of baking powder.
- Cream butter and sugar into clouds:
- Beat softened butter and sugar together until it's pale, fluffy, and almost white-looking, which should take about 2 to 3 minutes. This step aerates the dough and is why your cookies won't come out dense and greasy.
- Build the wet base:
- Add the egg, vanilla extract, and milk, mixing until everything is combined and the bowl smells like pure vanilla heaven. The milk adds just enough moisture to prevent the dough from being too stiff, which I discovered after making an aggressively dry batch.
- Marry wet and dry gently:
- Gradually add the dry ingredients to the wet mixture, mixing on low speed just until the dough comes together—don't overwork it or you'll develop gluten and end up with tough cookies instead of tender ones.
- Chill and set:
- Divide dough into two disks, wrap each in plastic wrap, and refrigerate for at least an hour (I usually do overnight). Cold dough rolls out cleanly and holds its shape during baking instead of spreading into shapeless blobs.
- Heat and prepare:
- Preheat your oven to 350°F and line baking sheets with parchment paper—this prevents sticking and ensures even browning on the bottom without burning.
- Roll and cut with intention:
- On a lightly floured surface, roll the dough to about 1/4-inch thickness and cut your shapes, working quickly so the dough doesn't warm up and become sticky. A bench scraper makes lifting shapes easier than a spatula ever could.
- Space for air circulation:
- Arrange cookies about an inch apart on your prepared sheets so heat can circulate underneath and around each one. Crowded cookies steam instead of bake.
- Bake until just golden:
- Bake for 10 to 12 minutes—the edges should barely start turning golden while the centers still look slightly underbaked. They'll firm up as they cool, and removing them early is the difference between tender and dry.
- Cool with patience:
- Let cookies rest on the baking sheet for about 5 minutes so they set up, then transfer to a wire rack to cool completely before icing. Warm cookies and wet icing are a disaster waiting to happen.
- Make your icing base:
- Combine sifted powdered sugar, meringue powder, vanilla extract, and 4 tablespoons of warm water in a large bowl and beat on low speed until smooth and glossy. Add more water a teaspoon at a time if you need a thinner consistency for flooding, or keep it thicker for piping details.
- Tint with purpose:
- Divide the icing into separate bowls and add gel food coloring drop by drop, stirring thoroughly—gel colors are potent, and you can always add more but you can't take it back.
- Decorate with vision:
- Use piping bags for fine details and squeeze bottles for flooding larger areas, working on fully cooled cookies so the icing doesn't melt into them. Allow the icing to set completely—usually 2 to 4 hours—before stacking or storing.
 Save to Pinterest
 There's something special about watching someone's face when they realize a cookie is both beautiful and delicious, not just one or the other. These Pure Vanilla cookies managed that balance perfectly, and suddenly I understood why my roommate was so excited about recreating a video game character as actual food.
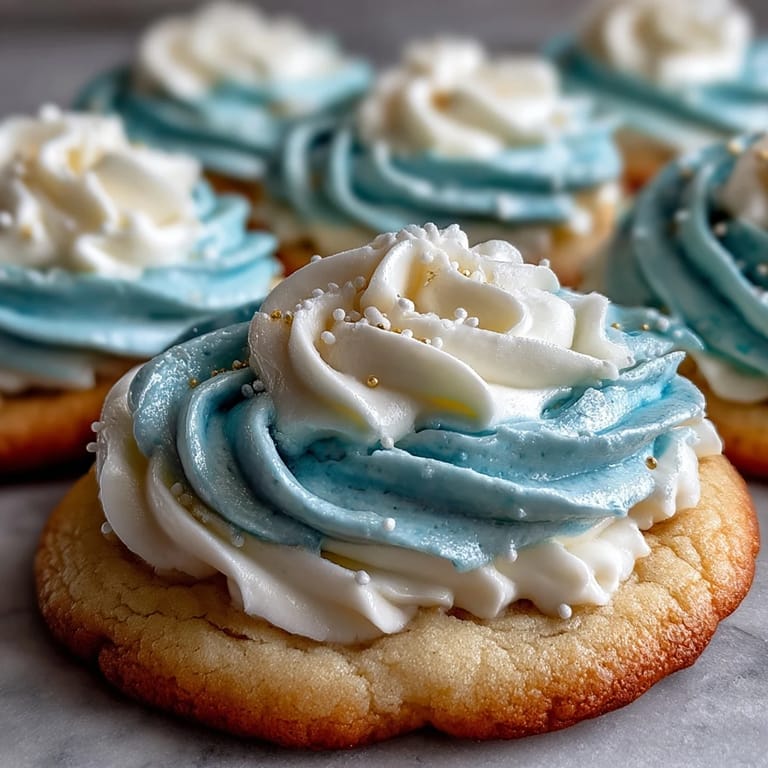
The Pure Vanilla Palette and Why It Works
The blue, white, and gold color scheme isn't just random—it creates a refined, almost magical appearance that transforms a simple sugar cookie into something that feels like it belongs in a fancy bakery display. When you pipe blue accents and gold details over white icing, the cookies catch the light in a way that makes them seem almost luminous. It's worth investing in quality gel food coloring because cheap coloring can muddy your carefully planned palette.
Royal Icing: The Decorating Game-Changer
Royal icing intimidated me before I made it—I thought it required special knowledge or fancy equipment. The truth is that once you understand the basic formula of powdered sugar, meringue powder, vanilla, and water, it becomes a tool you'll use for everything from cookies to cupcake toppers. The meringue powder is the magic ingredient that makes it set hard and glossy instead of staying wet and sticky.
Storage, Gifting, and Seasonal Uses
Because the royal icing hardens completely, these cookies are exceptional for gifting—they stack neatly in boxes, they don't get crushed easily, and they stay fresh for up to a week in an airtight container at room temperature. I've shipped these across the country in decorated boxes and they arrived looking pristine. They're perfect for themed parties, but honestly, they're equally great for holiday cookie swaps or just because moments.
- Store finished cookies in an airtight container with parchment between layers to prevent sticking.
- Make these ahead of time since the dough actually improves after a day or two in the fridge.
- If icing cracks while it's setting, a tiny dab of water smoothed with your finger can help hide imperfections.
 Save to Pinterest
 These cookies reminded me that sometimes the most memorable treats are the ones made with a specific person or moment in mind. Whether you're decorating them in the Pure Vanilla theme or making them your own, they're proof that vanilla is never boring when it's treated with respect.
Recipe Questions & Answers
- → How do I achieve a smooth royal icing consistency?
Beat powdered sugar, meringue powder, vanilla, and water on low speed until glossy and smooth. Adjust water 1 tsp at a time to reach desired consistency.
- → Can I prepare the dough ahead of time?
Yes, chilling the dough for at least one hour improves texture and makes it easier to roll and cut shapes accurately.
- → What colors work best for decorating?
Blue, white, and gold or yellow gel colors complement the pure vanilla theme beautifully, adding vibrant decorative accents.
- → How long should I bake the cookies?
Bake at 350°F (175°C) for 10 to 12 minutes, or until edges just begin to turn golden for tender, cooked-through cookies.
- → How should the decorated cookies be stored?
Keep them in an airtight container at room temperature for up to one week to maintain freshness and icing firmness.