 Save to Pinterest
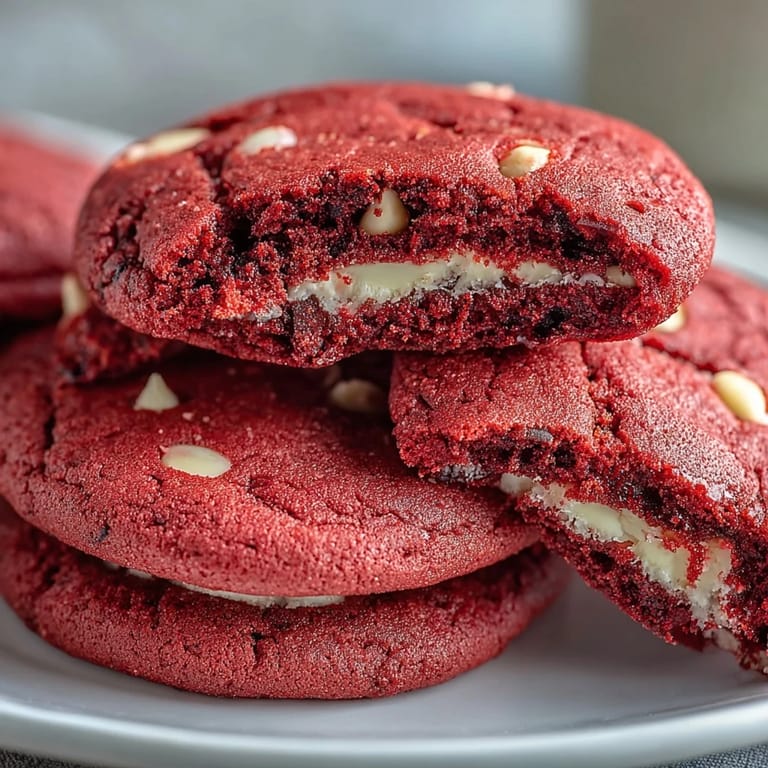
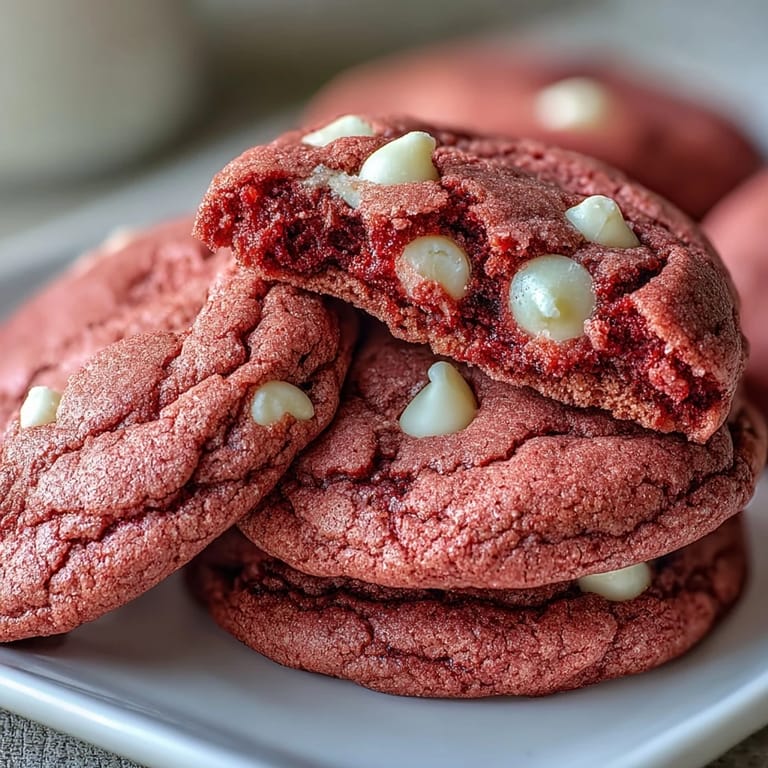
 The kitchen was a mess of flour and pink-tinted fingerprints when I finally pulled the first tray from the oven. I had been experimenting with food coloring for a baby shower, trying to find something cheerful that didn't taste artificial. These cookies surprised me with their soft centers and the way the white chocolate melted into sweet pockets against the tangy pink dough. My neighbor peeked over the fence later that afternoon, drawn by the scent of vanilla and butter, and left with half a dozen still-warm cookies wrapped in a tea towel.
I brought a batch to a potluck once, stacked in a glass jar tied with ribbon. A little girl asked if they were strawberry, and when I told her they were just vanilla with a secret pink twist, she insisted on taking one for her lunchbox the next day. Her mom texted me that evening asking for the recipe. I've been making them ever since for birthdays, bake sales, and those moments when you just need something sweet and bright to lift the mood.
Ingredients
- All-purpose flour: The backbone of these cookies, providing structure without making them cakey, and I always spoon it into the measuring cup instead of scooping to avoid dense dough.
- Baking powder and baking soda: This duo gives the cookies a gentle lift and that signature chewy texture with slightly crisp edges.
- Salt: Just half a teaspoon cuts through the sweetness and makes every other flavor more vivid.
- Unsalted butter: Softened to room temperature, it creams beautifully with sugar and creates that melt-in-your-mouth richness.
- Granulated sugar: Sweetens and helps achieve a tender crumb, plus it gives the edges a delicate crackle as they bake.
- Egg: Binds everything together and adds moisture, I always crack mine into a small bowl first to avoid any shell surprises.
- Vanilla extract: Pure vanilla makes all the difference, the imitation stuff just doesn't have the same warm depth.
- Pink gel food coloring: Gel is the key here because liquid coloring thins out the dough and gives you a washed-out pastel instead of that vibrant hue.
- White chocolate chips: They melt into creamy sweet pockets and their color contrasts beautifully with the pink dough.
Tired of Takeout? 🥡
Get 10 meals you can make faster than delivery arrives. Seriously.
One email. No spam. Unsubscribe anytime.
Instructions
- Whisk the dry ingredients:
- Combine flour, baking powder, baking soda, and salt in a medium bowl, whisking until evenly mixed. Set it aside while you work on the butter and sugar.
- Cream butter and sugar:
- Beat softened butter and granulated sugar together for 2 to 3 minutes until the mixture looks pale and fluffy, this step adds air and ensures a tender cookie. Scrape down the sides of the bowl halfway through so everything incorporates evenly.
- Add egg and flavorings:
- Beat in the egg and vanilla extract until smooth, then add your pink gel food coloring and mix until the color is even and vibrant. The dough will look almost neon at first but bakes to a softer shade.
- Combine wet and dry:
- Gradually add the flour mixture to the butter mixture on low speed, mixing just until no white streaks remain. Overmixing develops gluten and leads to tough cookies instead of soft ones.
- Fold in chocolate chips:
- Use a spatula to gently fold in the white chocolate chips, distributing them evenly without overworking the dough. I like to save a few chips to press on top of each ball before baking.
- Chill the dough:
- Cover the bowl with plastic wrap and refrigerate for 30 minutes to firm up the butter and prevent spreading in the oven. This step is worth the wait, trust me.
- Preheat and prep:
- Set your oven to 350°F and line two baking sheets with parchment paper while the dough chills. Parchment keeps the bottoms from browning too quickly.
- Scoop and space:
- Use a tablespoon or cookie scoop to portion the dough into balls, placing them about 2 inches apart on the prepared sheets. They spread just enough to create soft edges without becoming thin and crispy.
- Bake until set:
- Bake for 10 to 12 minutes, watching for edges that look set while centers remain soft and slightly underbaked. They will look puffy and pale in the middle, that's exactly what you want.
- Cool and enjoy:
- Let cookies rest on the baking sheets for 5 minutes to firm up, then transfer to a wire rack. They finish cooking with residual heat and turn perfectly chewy as they cool.
 Save to Pinterest
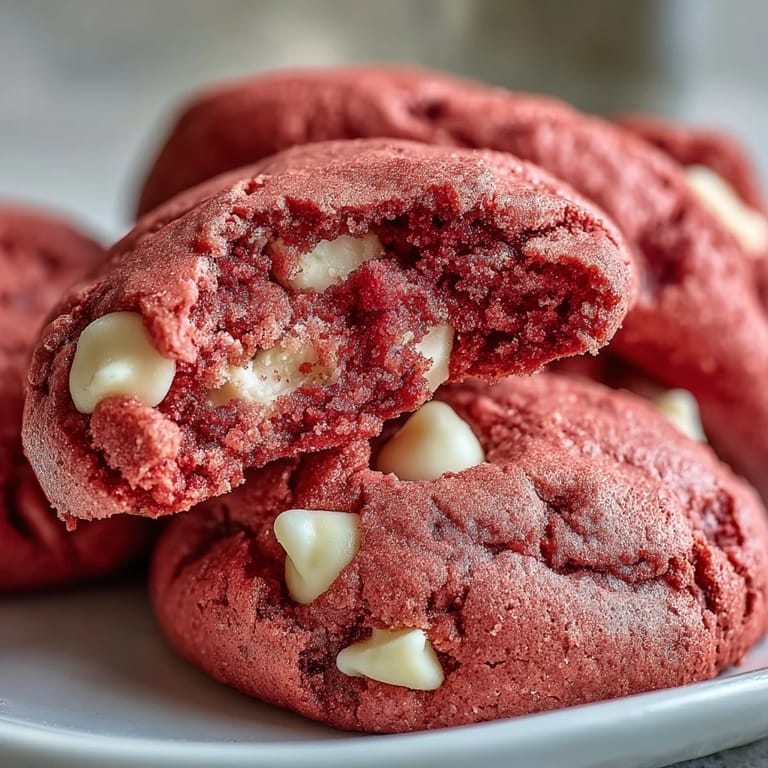
 There was an afternoon last spring when my niece helped me make a double batch for her school fundraiser. She insisted on adding extra chocolate chips to every single cookie, pressing them into the tops with her small fingers. We laughed when the first tray came out looking like polka-dotted pillows. Those cookies sold out in the first ten minutes, and she beamed with pride, pink frosting smudged on her cheek from taste-testing.
Storing and Keeping Them Fresh
These cookies stay soft and chewy for up to a week when stored in an airtight container at room temperature. I layer them with parchment paper to prevent sticking, especially if the white chocolate is still a bit melty. If you want to freeze the dough, scoop it into balls, freeze on a tray, then transfer to a zip-top bag for up to three months. You can bake them straight from frozen, just add an extra minute or two to the baking time.
Flavor Variations Worth Trying
I've stirred in half a teaspoon of almond extract for a subtle bakery-style flavor that pairs beautifully with the white chocolate. A few drops of rose water turn these into something almost elegant, perfect for bridal showers or tea parties. For a fun twist, swap the white chocolate chips for dark chocolate or even strawberry chips if you can find them. You could also tint half the dough a deeper pink and swirl the two shades together before chilling for a marbled effect.
Troubleshooting and Final Touches
If your cookies spread too much, your butter was likely too soft or the dough didn't chill long enough. On the flip side, if they stay thick and cakey, you may have added too much flour or overbaked them. The edges should be set and barely golden while the centers stay soft and pillowy.
- Press a few extra white chocolate chips on top of each dough ball right before baking for a bakery-worthy look.
- Let the cookies cool on the baking sheet for the full 5 minutes or they'll break apart when you try to move them.
- For cookie sandwiches, spread cream cheese frosting between two cooled cookies and roll the edges in sprinkles.
 Save to Pinterest
 These cookies have become my go-to whenever I need something cheerful, simple, and guaranteed to make people smile. Keep a batch in the freezer and you'll always have a reason to celebrate, even on the most ordinary days.
Recipe Questions & Answers
- → Can I make these cookies without food coloring?
Yes, you can omit the pink gel food coloring entirely. The cookies will taste just as delicious, they simply won't have the signature pink hue. You'll end up with classic vanilla cookies with white chocolate chips.
- → Why do I need to chill the dough?
Chilling the dough for 30 minutes helps the cookies hold their shape during baking and prevents excessive spreading. It also allows the flour to hydrate properly, resulting in a better texture and more controlled baking.
- → Can I freeze the cookie dough?
Absolutely. You can freeze the dough balls on a baking sheet until solid, then transfer them to a freezer bag for up to 3 months. Bake directly from frozen, adding 1-2 extra minutes to the baking time.
- → How do I know when the cookies are done?
The cookies are ready when the edges are set and lightly golden, but the centers still look slightly soft and underbaked. They will continue to firm up as they cool on the baking sheet, resulting in that perfect chewy texture.
- → Can I use liquid food coloring instead of gel?
Gel food coloring is recommended because it provides vibrant color without adding extra liquid to the dough. Liquid food coloring may require more volume to achieve the same shade and could alter the dough consistency.
- → What can I substitute for white chocolate chips?
You can use milk chocolate chips, dark chocolate chips, or even chunks of chopped white chocolate. For a fun twist, try adding sprinkles, dried cranberries, or chopped nuts instead.