 Save to Pinterest
 Last April, I was searching for a quick Easter treat that wouldn't require elaborate decorating or fiddly molds. The idea of combining salty pretzels with rich peanut butter and silky chocolate started as a craving during an afternoon thunderstorm, when the sound of rain made kitchen experiments oddly comforting. I found myself crushing pretzels by hand and laughing as crumbs flew everywhere—a sign these cups would deliver both flavor and fun. The first batch disappeared faster than I anticipated, thanks to my neighbor stopping by for a coffee and leaving with three. This recipe always seems to bring a bit of joy, whether it's shared on a whim or saved for a rainy day snack.
I tried these for the first time when my cousin came over for movie night, and we ended up devouring the batch before the opening credits. We both agreed the salty-sweet combo was addictive and reminisced about childhood candy—only now, our kitchen looked like adults had done the damage. The laughing, the chocolate smears, and a plate of empty wrappers made it feel like a genuine celebration. I realized then, these cups were perfect for sharing and always spark conversation. That spontaneous gathering turned into an annual tradition, where we challenge ourselves to decorate them differently each time.
Ingredients
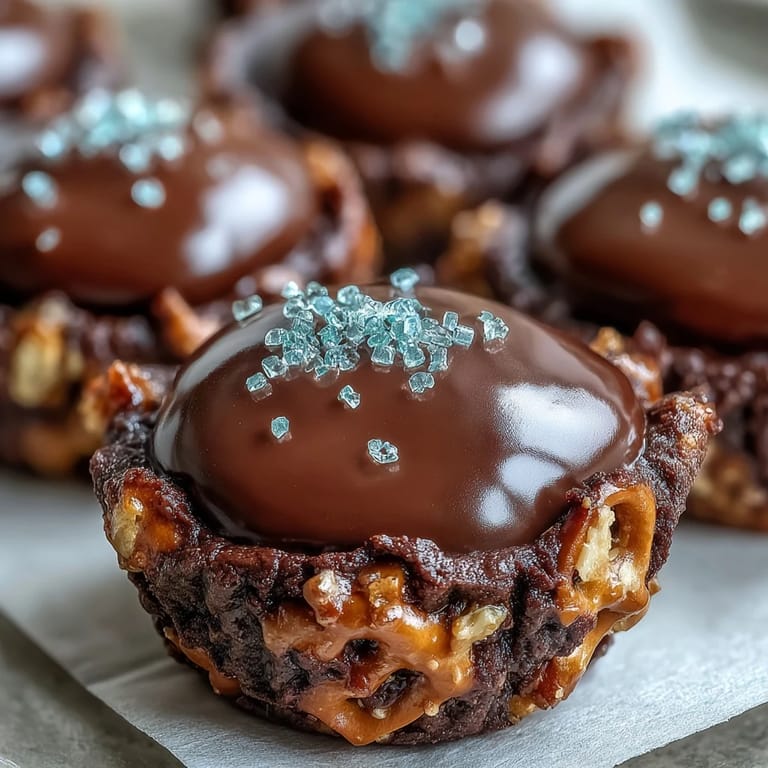
- Salted pretzels: Crushing your pretzels finely gives the crust its crunch; pulse them in a food processor for even texture.
- Unsalted butter: Melted butter binds the crust without adding extra salt, keeping things balanced.
- Granulated sugar: Just a touch helps the pretzels caramelize slightly and hold together.
- Creamy peanut butter: Choose a smooth, spreadable brand; natural peanut butter can be too runny unless well-stirred.
- Powdered sugar: This sweetens the filling and gives a silky texture—regular sugar won't dissolve as well.
- Pure vanilla extract: Adds warmth and dimension to the peanut butter layer (don't skip it).
- Semi-sweet chocolate chips: They melt smoothly for topping, but you can swap dark chocolate chips for a deeper flavor.
- Coconut oil or vegetable oil: This creates a glossy, snappy chocolate layer that won't seize.
- Colored sprinkles or flaky sea salt: Use sprinkles for festive vibes or sea salt for classic elegance; both add crunch and fun.
Tired of Takeout? 🥡
Get 10 meals you can make faster than delivery arrives. Seriously.
One email. No spam. Unsubscribe anytime.
Instructions
- Line and prep:
- Start by fitting your mini muffin tin with paper liners—it's a small step, but the crackle of liners always signals dessert is coming soon.
- Mix pretzel crust:
- Combine crushed pretzels, melted butter, and granulated sugar in a bowl, making sure every pretzel bit glistens and sticks together beautifully.
- Press crust:
- Scoop about 1 tablespoon into each liner, then press with your fingers or the bottom of a spoon—you’ll hear a satisfying crunch that means it’s working!
- Freeze the crust:
- Pop the tray in the freezer for 10 minutes, which gives you time to prep the filling and lets the crust set into a firm, buttery layer.
- Make peanut butter filling:
- Beat peanut butter, softened butter, powdered sugar, and vanilla until silky smooth—with a hand mixer or fork, it’ll smell sweet and nutty.
- Add filling:
- Place about 1 tablespoon onto each chilled crust and gently smooth it, making sure the filling hugs the edges.
- Melt chocolate topping:
- Microwave chocolate chips and oil in short bursts, stirring until glossy and lump-free; the aroma will tell you it’s ready.
- Layer chocolate:
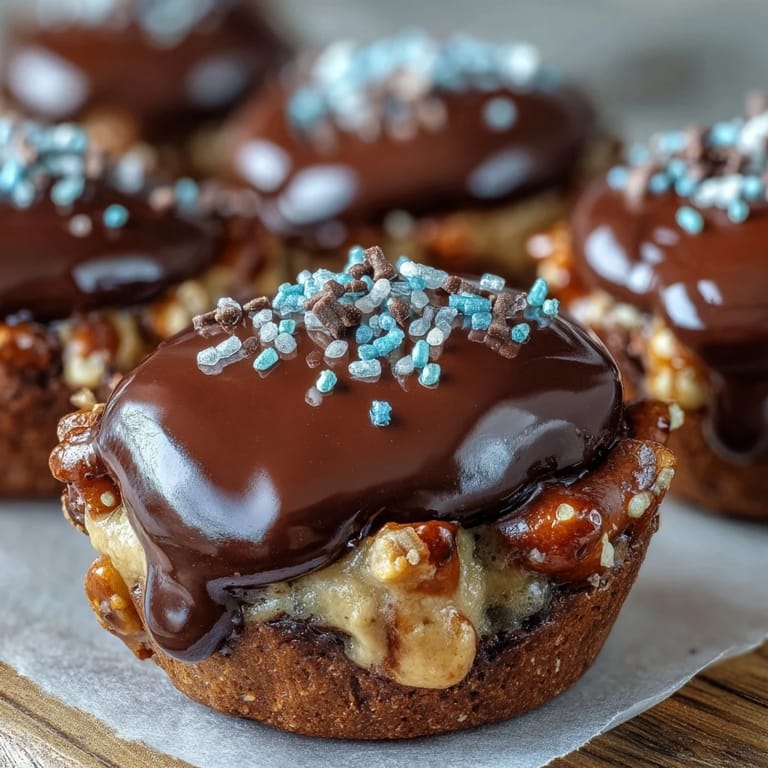
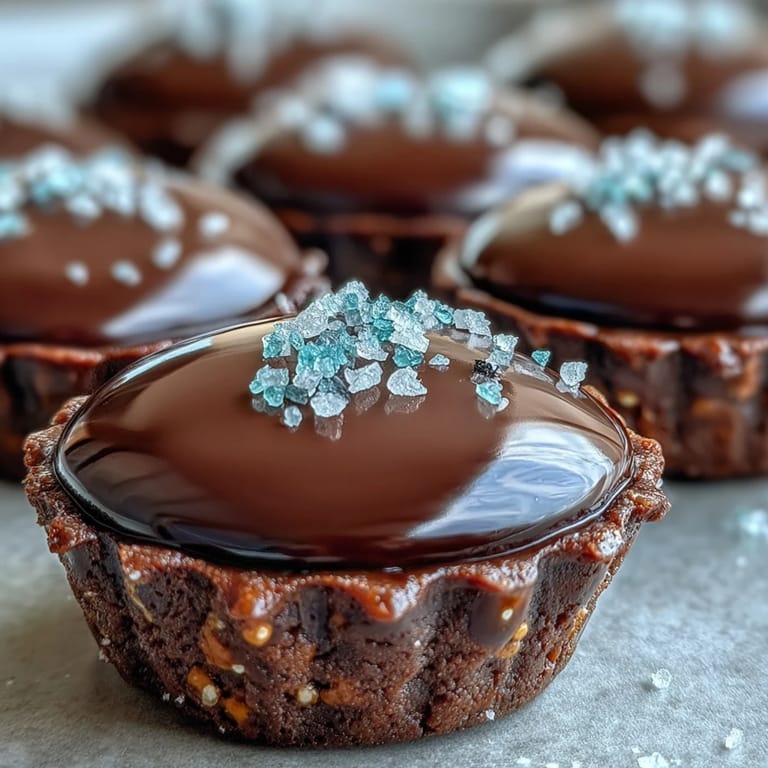
- Spoon melted chocolate over each cup, covering the peanut butter completely for a ganache-like cap.
- Decorate:
- Scatter sprinkles or flaky sea salt on top—this is the fun part where everyone can get creative.
- Chill:
- Refrigerate for 30 minutes or longer, until the topping has set and the layers hold together when you unwrap.
- Store:
- Keep your finished cups in the fridge until you’re ready to serve—they taste best chilled and hold their shape beautifully.
 Save to Pinterest
 One afternoon, I set these out for friends at a spring picnic, and even the grown-ups crowded around them like kids at a candy store. The mix of textures and flavors made everyone pause after the first bite and then sigh happily—moments like that remind me food connects us beyond the recipe itself. These cups earned their place as the treat everyone requests, even when the weather calls for lemonade instead of hot cocoa.
How to Get the Peanut Butter Filling Just Right
I learned the filling turns out creamiest when the butter is truly soft; if it's a little cold, it won't blend right, and you'll end up with lumps. Mixing the ingredients thoroughly creates a cloud-like fluffiness that spreads easily onto the crust without tearing it. Using a small spatula or the back of a spoon keeps the peanut butter layer level, which looks pretty when you slice into the cup later. If you prefer a firmer filling, chill the mixture for 5 minutes before scooping. Adjust the sweetness with more or less powdered sugar depending on your mood.
Getting the Chocolate Layer Smooth
The trick to silky chocolate is patience—microwave in short bursts and stir in between, or you risk scorched bits that are impossible to salvage. Adding coconut oil changes the texture just enough to give the chocolate a pleasant snap and shine. When spooning chocolate over each cup, let it gently settle without rushing; gravity will do most of the spreading. If you want extra thick topping, double the chocolate layer, but keep in mind it will take longer to chill. Sprinkles are best added before the chocolate sets so they stick perfectly.
Smart Make-Ahead Tips for Busy Days
These chocolate cups truly shine when made ahead—the flavors meld and the texture improves after a full night in the fridge. If you're prepping for a party or holiday, store the cups in an airtight container; they stay fresh for up to five days. Small batches can be frozen, just wrap tightly and thaw in the fridge before serving.
- Let cups sit at room temperature for 5 minutes before eating for the best texture.
- Use parchment paper in addition to liners if you want less sticking.
- Don’t skip the salt or sprinkles—they lift the sweetness and add crunch.
 Save to Pinterest
 I hope these cups bring laughter and a few happy messes to your kitchen. They’re simple enough for spontaneous sharing and delicious enough to make any occasion feel special.
Recipe Questions & Answers
- → Can I use a nut-free butter for the filling?
Yes, almond or sunflower seed butter is suitable. Adjust sweetness and texture if needed.
- → How should I store these chocolate cups?
Keep them refrigerated in an airtight container for freshness, up to 5 days.
- → Can the pretzel crust be made gluten-free?
Absolutely, simply substitute gluten-free pretzels for the base.
- → What type of chocolate works best?
Semi-sweet chocolate chips are recommended, but dark chocolate provides a richer taste.
- → Are colored sprinkles or sea salt necessary for decoration?
No, they're optional; add for extra flavor or festive touch. The cups are delicious without them.
- → Is it possible to make these ahead of time?
Yes, prepare them in advance and chill; they remain fresh for several days.